ALGO Proxy Configuration Guide
This guide will walk you through purchasing a plan and configuring Residential Proxy on ALGO Proxy from start to finish.
Note!
The Web App interface may differ slightly from the guide but will not be significantly different.
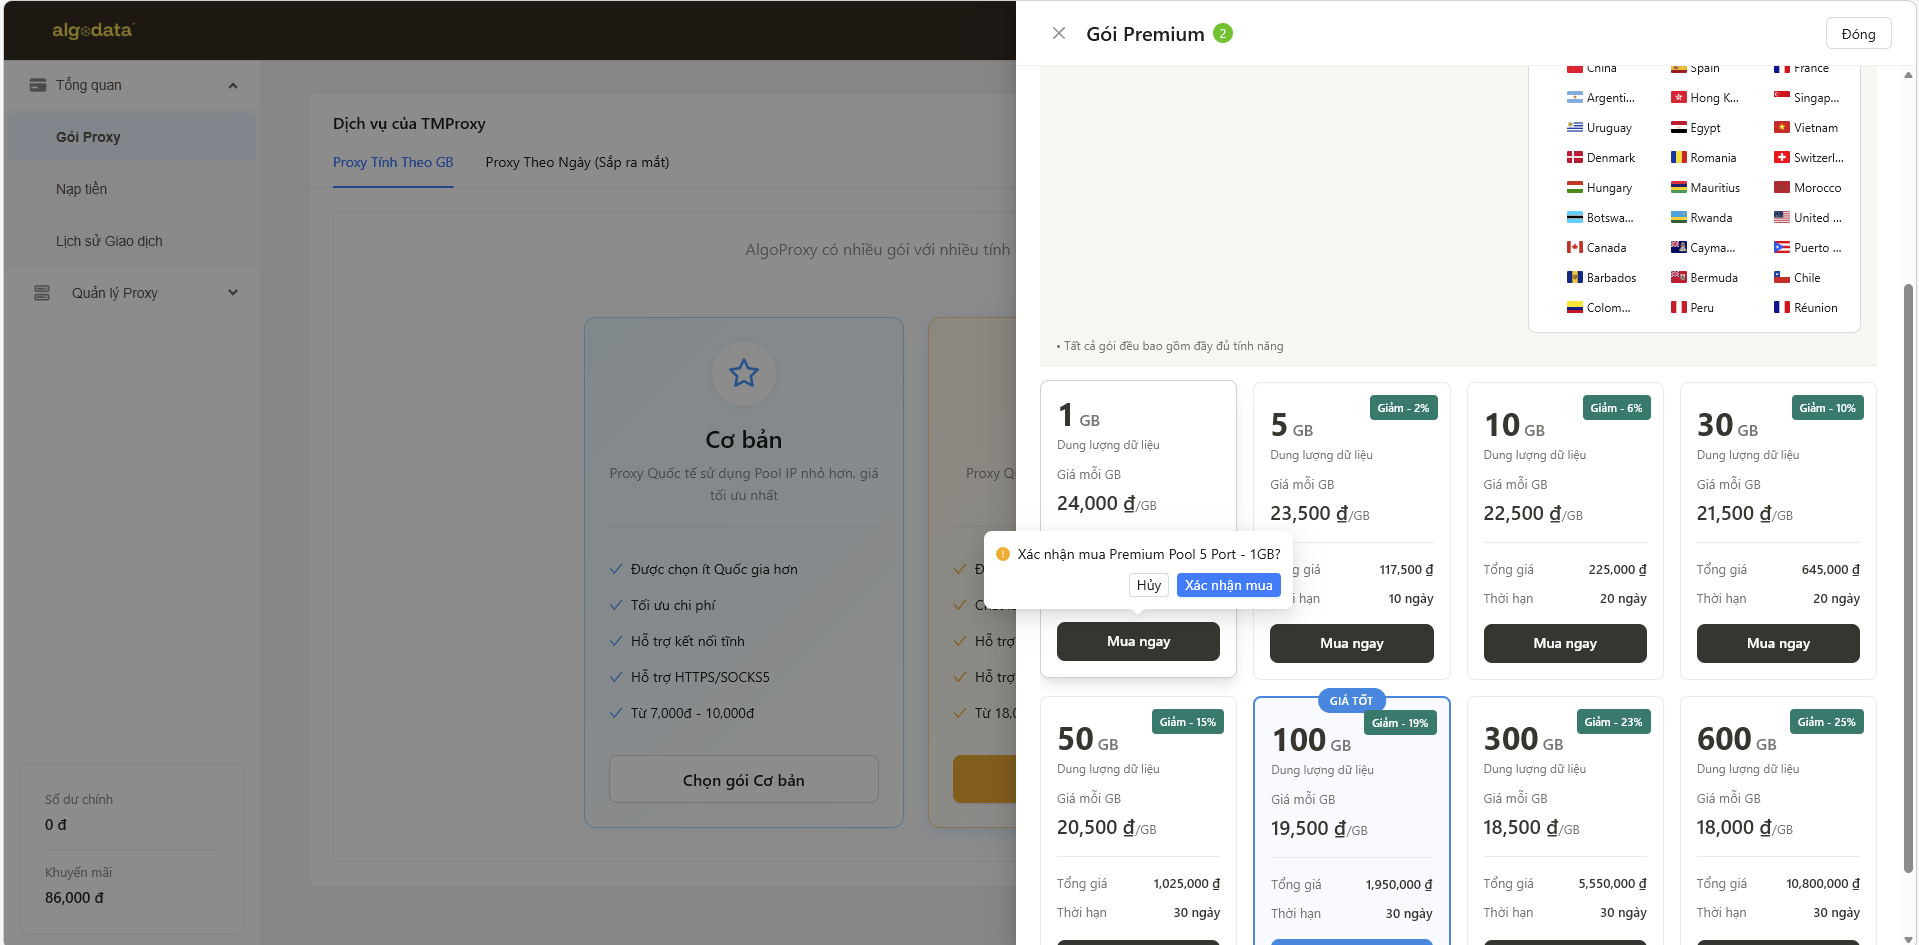
Step 1: Choose a Proxy Plan
Visit ALGO Proxy and log in. Go to Gói Proxy (Proxy Plans) in the left menu. You will see 3 service tiers:
Cơ bản (Basic): Suitable for using Proxy IP with limited bandwidth at a low price.
Nâng cao (Advanced): Includes more countries and superior configuration.
Doanh nghiệp (Enterprise): Proxy plan for organizations and businesses with advanced features.

Step 2: Purchase a Data Plan
Select the appropriate plan, then choose the data volume (1GB, 5GB, 10GB, 30GB, 50GB, 100GB, 300GB, 600GB) and your desired country from the flag list on the right.
Click “Mua ngay” (Buy Now) to complete the payment.
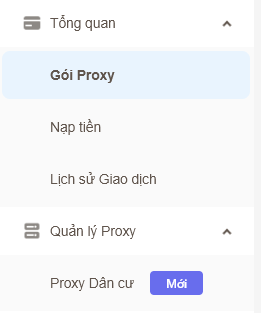
Step 3: Go to Proxy Management
After successfully purchasing the plan, go to the left menu and select Quản lý Proxy (Proxy Management) → Proxy Dân cư (Residential Proxy).
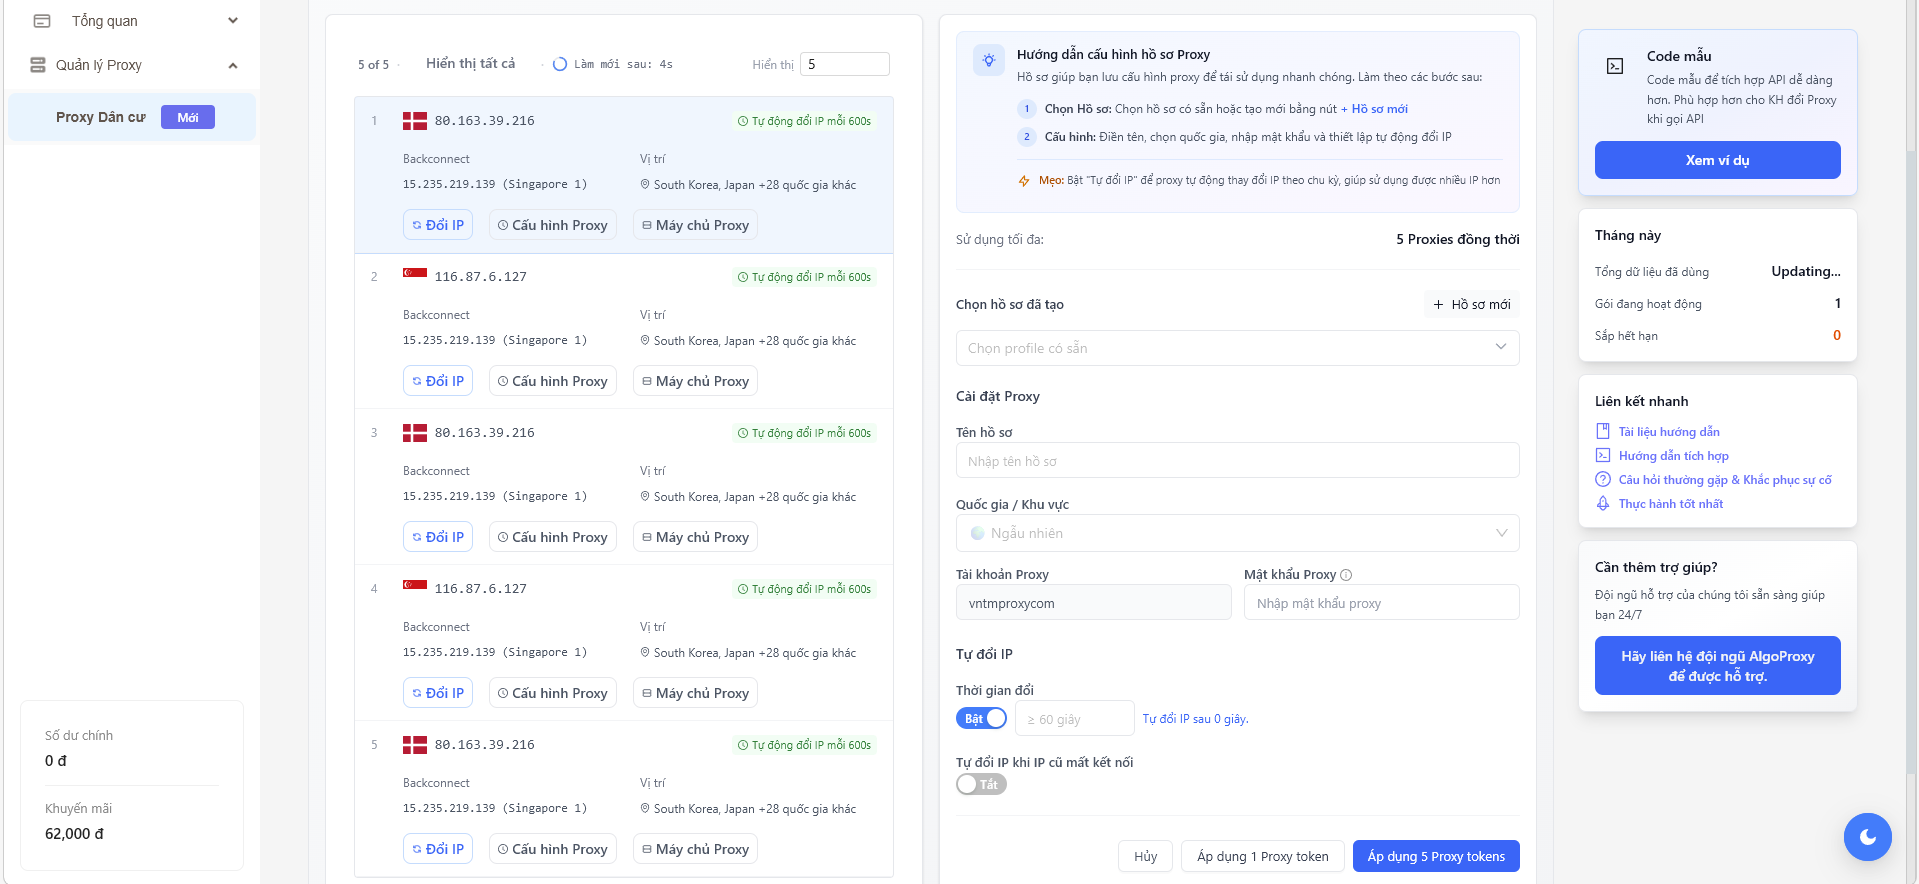
Step 4: View Proxy List
Here you will see the list of allocated Proxies. Each Proxy displays:
- IP address and country
- “Cấu hình Proxy” (Configure Proxy) and “Mua thêm Proxy” (Buy More Proxy) buttons
Click the “Cấu hình Proxy” (Configure Proxy) button to open the “Hướng dẫn cấu hình hồ sơ Proxy” (Proxy Profile Configuration Guide) panel on the right.
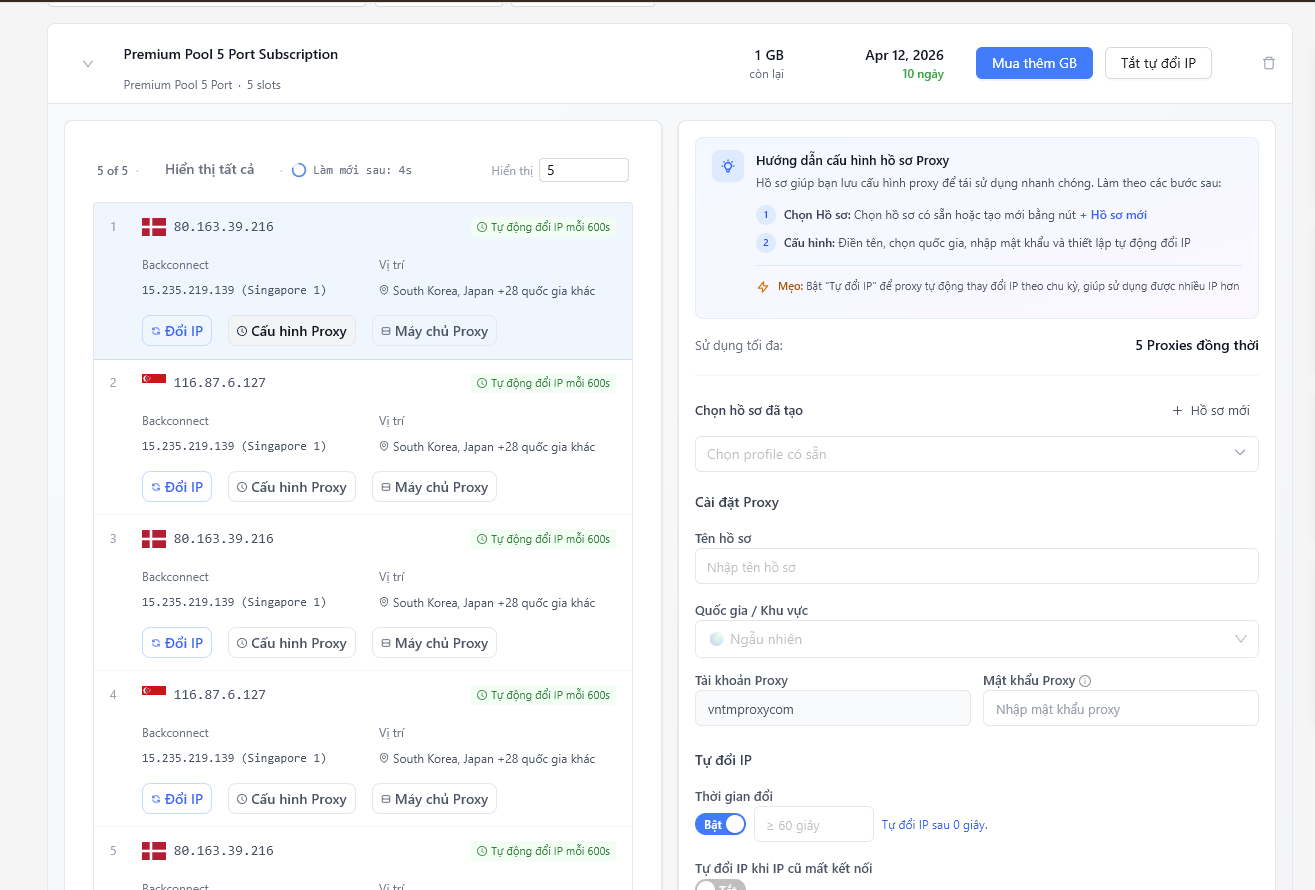
Step 5: Create Proxy Profile
In the “Hướng dẫn cấu hình hồ sơ Proxy” (Proxy Profile Configuration Guide) panel on the right, follow 2 steps:
- Chọn Hồ sơ (Select Profile): Choose an existing profile or create a new one by clicking + Hồ sơ mới (+ New Profile)
- Cấu hình (Configure): Enter name, select country, enter password and set up auto IP rotation
Tip!
Enable “Tự đổi IP” (Auto Change IP) to automatically rotate IPs on a schedule, allowing you to use more IPs.
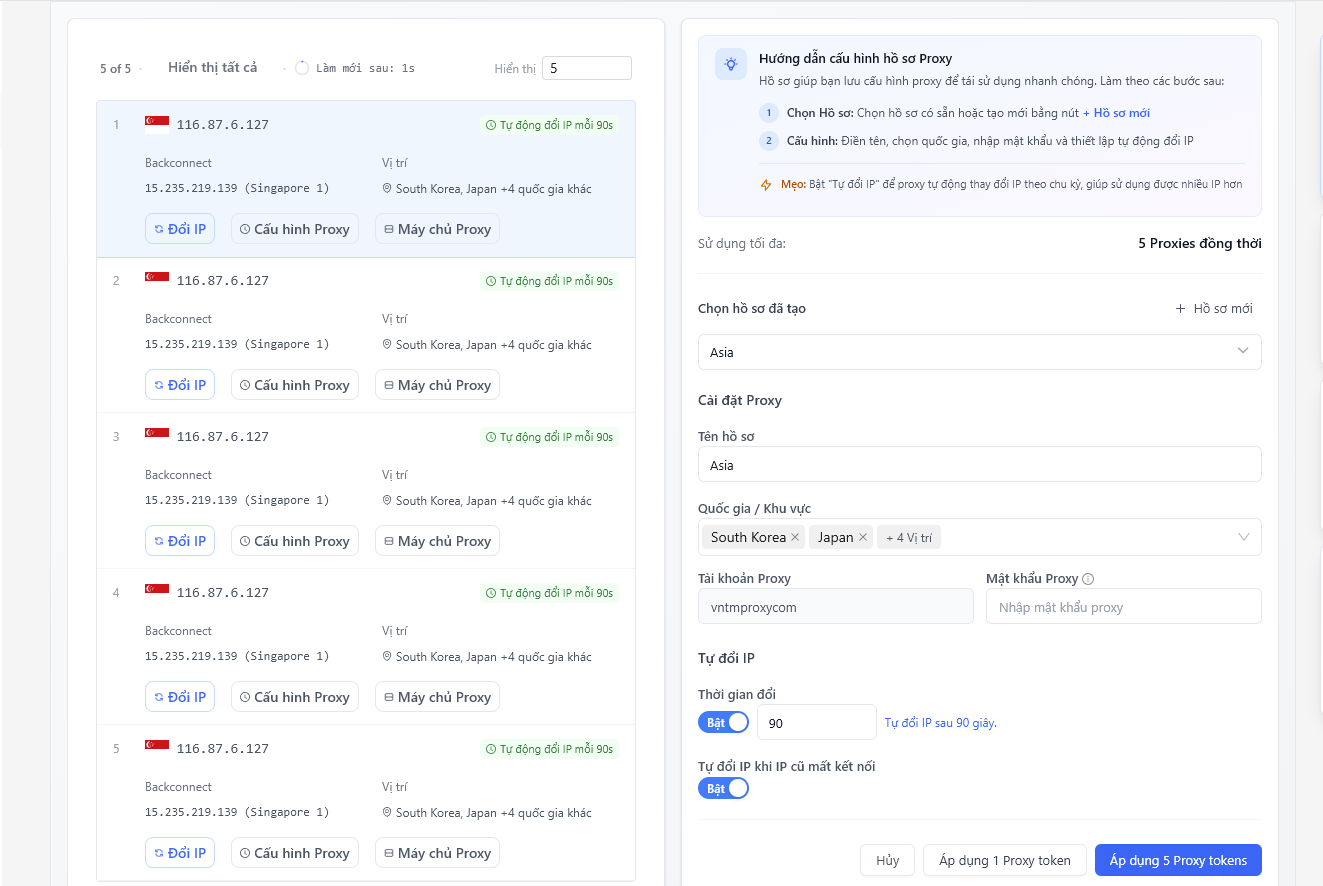
Select Country
In the profile configuration, select your desired country (e.g., South Korea, Japan, etc.).

Proxy Settings
Fill in the configuration information:
Tên hồ sơ (Profile Name): Enter a memorable name (e.g., Asia)
Quốc gia / Khu vực (Country / Region): Select your desired countries (e.g., South Korea, Japan, etc.)
Tài khoản Proxy (Proxy Account): Username (e.g., vntmproxycom)
Mật khẩu Proxy (Proxy Password): Enter the proxy password
Tự đổi IP (Auto Change IP): Enable and enter the rotation time (e.g., 90 seconds)
Tự đổi IP khi IP cũ mất kết nối (Auto Change IP on Disconnect): Enable to avoid service interruption
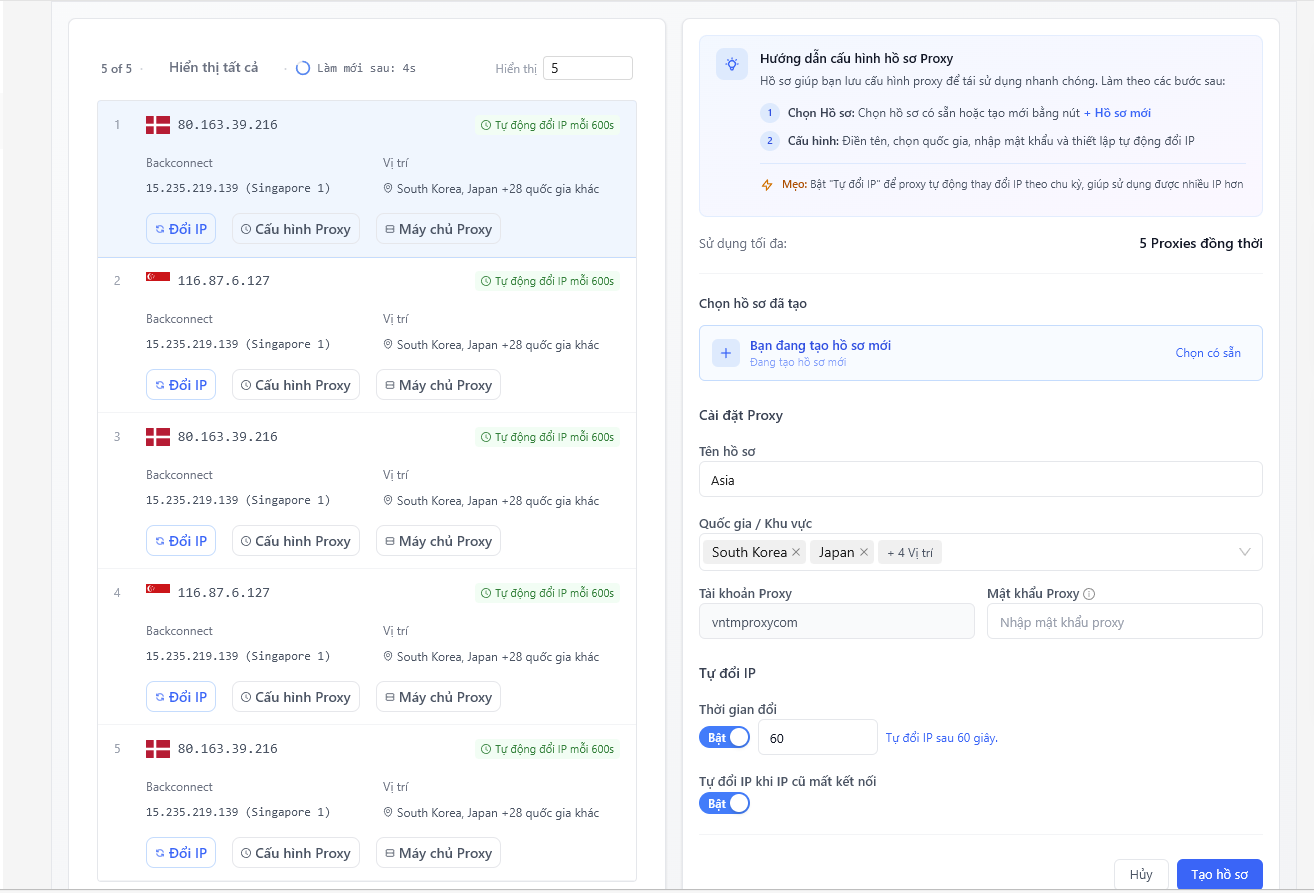
After filling in all the information, click the “Tạo hồ sơ” (Create Profile) button to save the profile.
Step 6: Apply Configuration
After creating the profile successfully, click “Áp dụng 1 Proxy token” (Apply 1 Proxy token) to apply to the current Proxy, or “Áp dụng 5 Proxy tokens” (Apply 5 Proxy tokens) to apply to all Proxies in the plan.
Step 7: Get Connection Information
After successful application, you will see the “Hoạt động điều ra” (Output Activity) panel displaying the proxy connection strings. Click the green “sao chép cấu hình” (Copy Configuration) button to copy the proxy information.
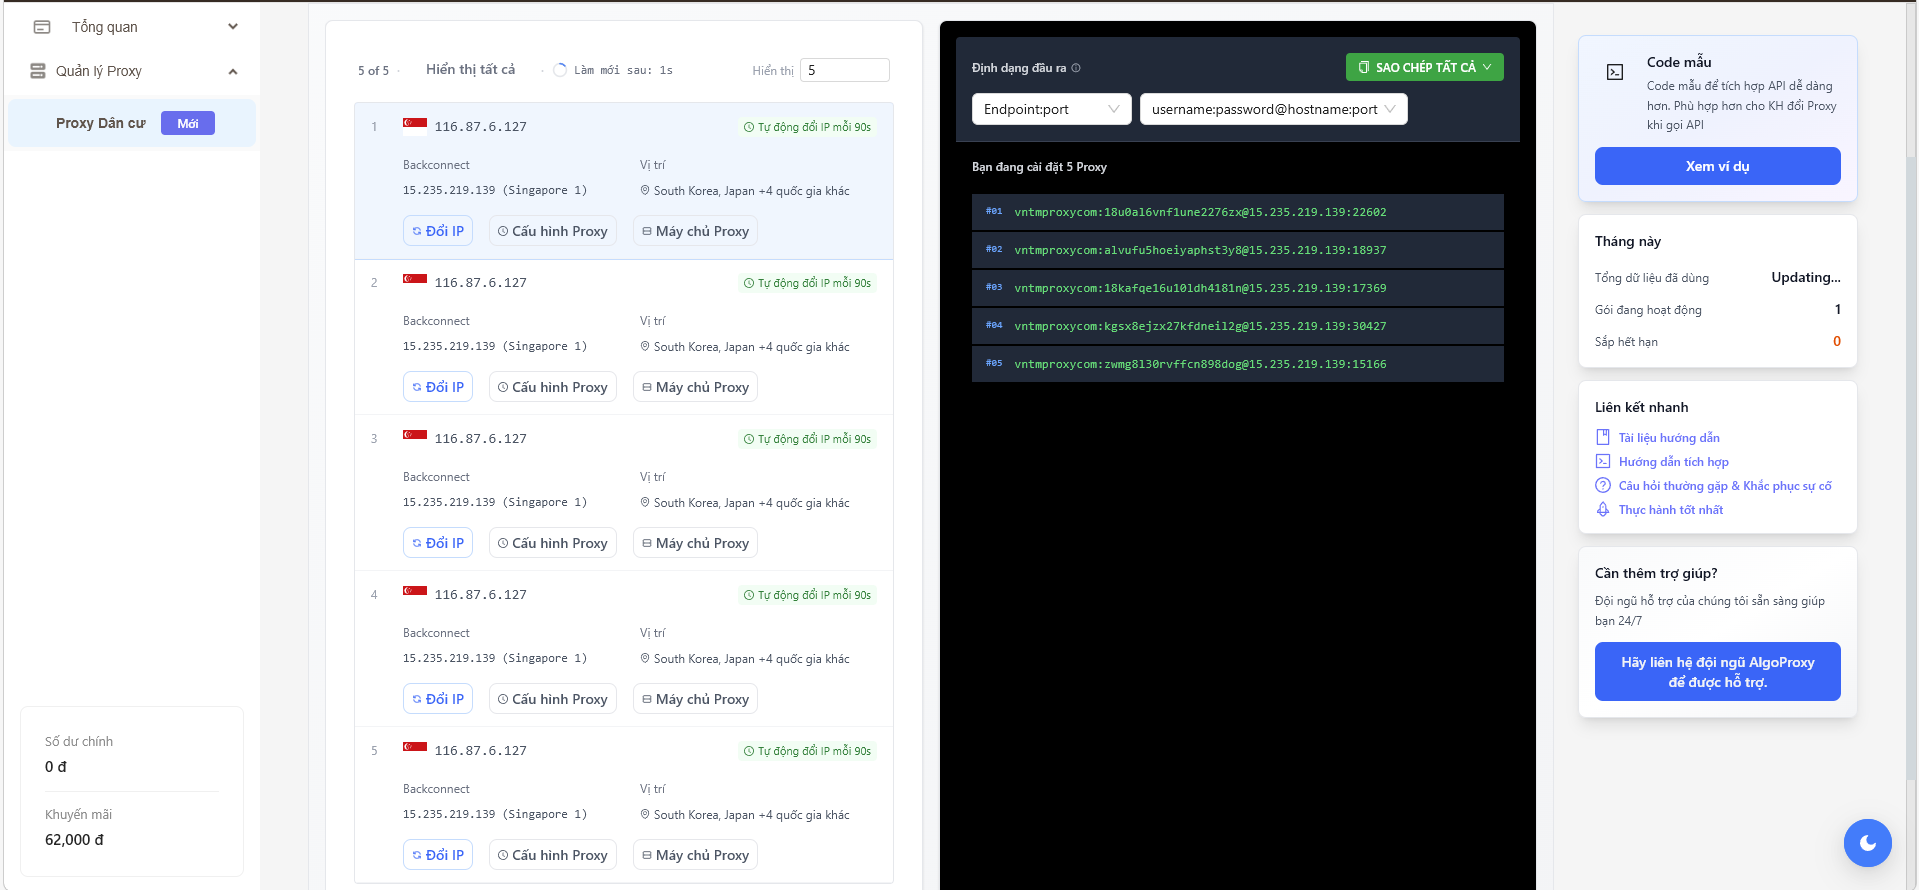
Paste the proxy information into the software or platform you want to use.
That’s it for the ALGO Proxy configuration guide. Good luck!
Get started with us at:
- Website: https://tmproxy.com/
- Fanpage: https://www.facebook.com/TMProxy