User Guide for TMProxy Manager with BitBrowser
Why use TMProxy Manager with BitBrowser?
TMProxy Manager fixes the proxy IP address to a single local address, rotating the IP on a schedule without needing to update proxy settings in each BitBrowser profile.
This is the ideal approach when managing many profiles and wanting centralized IP control from TMProxy Manager instead of configuring each profile individually.
User Guide for TMProxy Manager with BitBrowser with Images
Step 1 — Set up API Key in TMProxy Manager
Open TMProxy Manager, enter the API Key from your TMProxy account and click Get Current IP or Get New IP.
Once connected successfully, TMProxy Manager will display the local proxy address (Socks5 and HTTPS) to fill in BitBrowser.
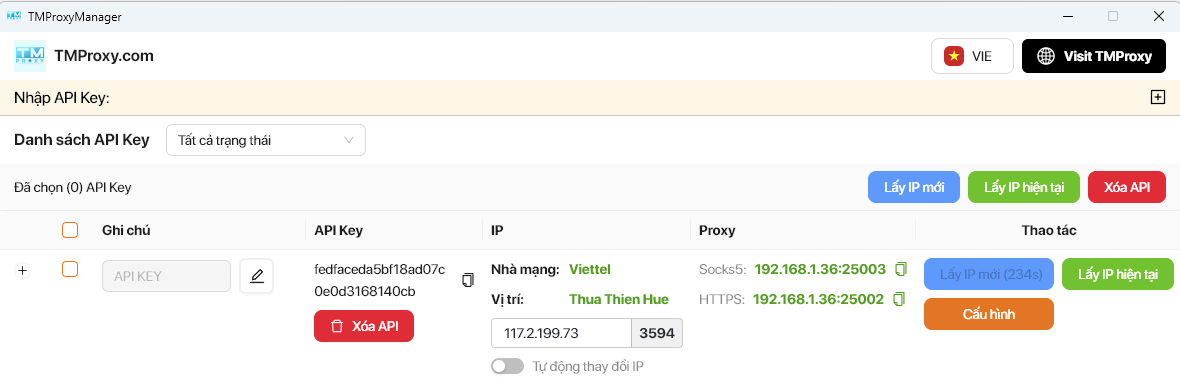
Note down:
- Host: local IP address (e.g.
192.168.1.36) - Port Socks5: e.g.
25003 - No username/password needed as TMProxy Manager handles authentication
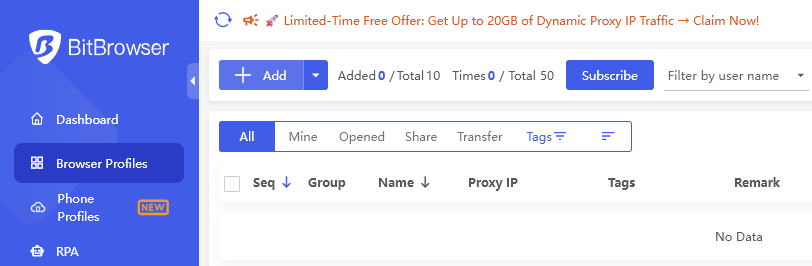
Step 2 — Open Browser Profiles and add a new profile
Log in to BitBrowser, select Browser Profiles in the left menu. Click + Add to create a new profile.
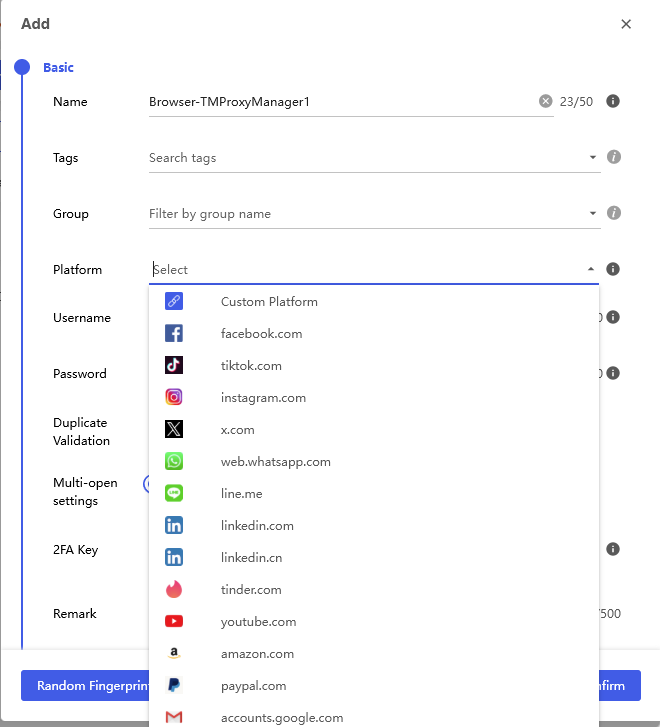
Step 3 — Fill in basic information
In the Basic tab, enter a profile name (e.g. Browser-TMProxyManager1) and select the appropriate platform.
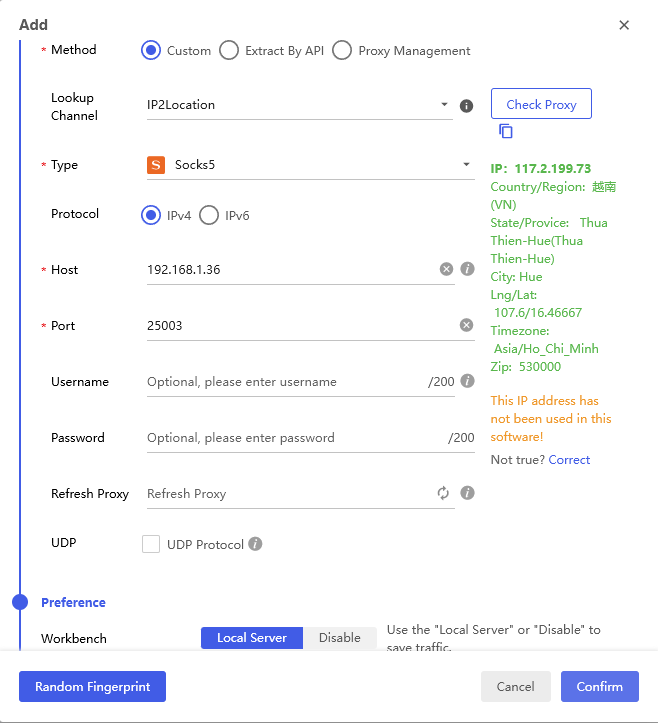
Step 4 — Configure Proxy using TMProxy Manager address
Switch to the Proxy tab and fill in the information as follows:
- Method: select
Custom - Type: select
Socks5 - Host: enter the local IP address from TMProxy Manager (e.g.
192.168.1.36) - Port: enter the Socks5 port (e.g.
25003) - Username and Password: leave blank (TMProxy Manager handles authentication)
- Click Check Proxy to verify — the real IP location info will appear on the right if successful
- Click Confirm to save the profile
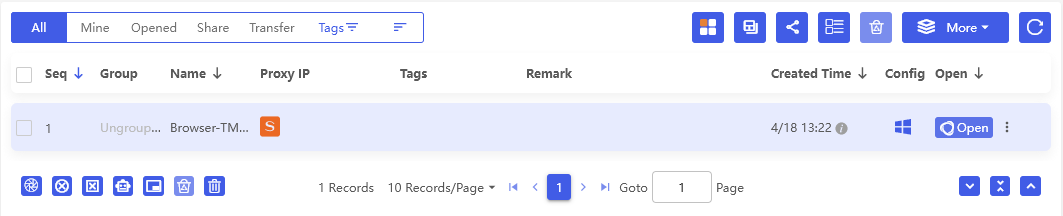
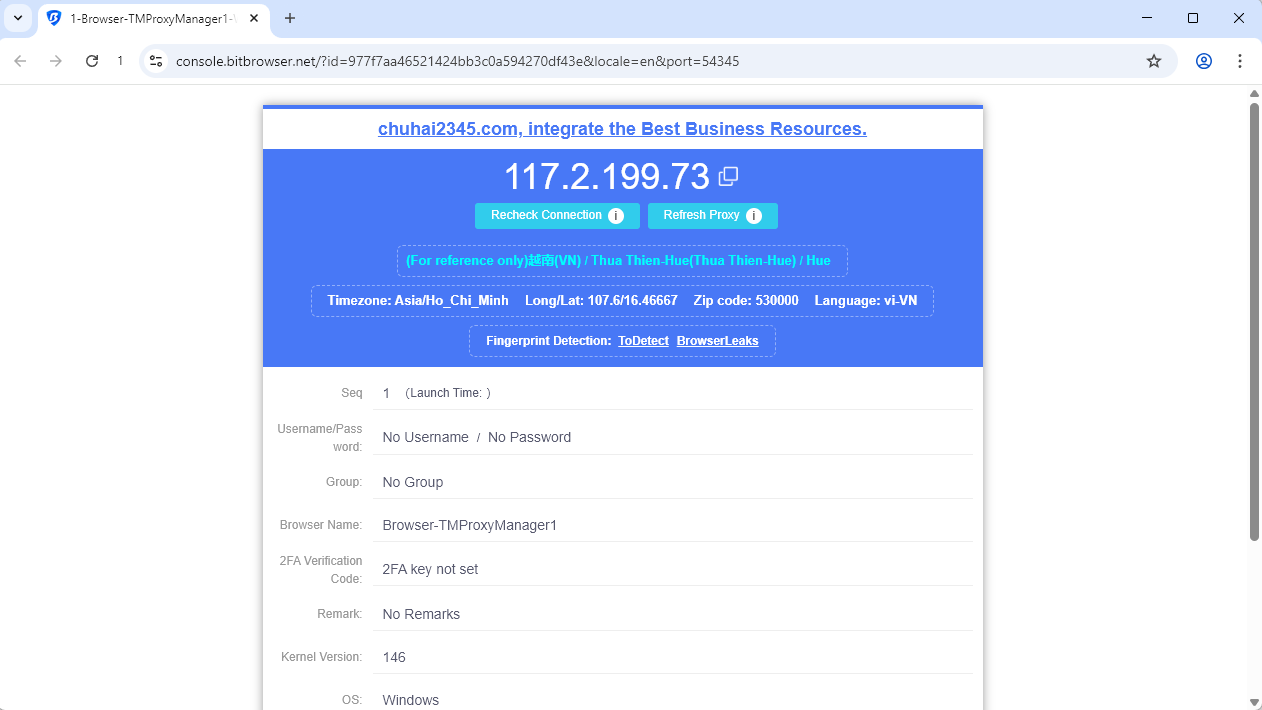
Step 5 — Open the profile and check IP
The newly created profile appears in the list. Click Open to launch the browser.
The browser opens and displays an IP check page with the real IP address from TMProxy. A result like the image below indicates success.
This is the article User Guide for TMProxy Manager with BitBrowser. When you need to change IP, simply do it in TMProxy Manager — all BitBrowser profiles using that local address will automatically switch to the new IP without editing each profile. Good luck!
In addition, we have many instructions for using http proxy / socks5 on various software and tools. Please click on the link https://docs.tmproxy.com/guide/
Disclaimer:
TMProxy is not affiliated with the developers of BitBrowser. This guide is for informational purposes only.
Get started with us at:
- Website: https://tmproxy.com/
- Fanpage: https://www.facebook.com/TMProxy